WebTop user guide
End-user features of the WebTop groupware.
WebTop modules in this manual:
Authentication
To log in to the web interface, you can use either the short form, only <username> (without @<domain>), or the full form including the domain.
The domain associated with the user is always the one selected in the instance settings and related to the connected Mail server.
User settings management
Most user settings can be directly managed by the user itself via the settings menu. Locked settings require administrative privileges.
The administrator can impersonate users, to check existing accounts using special login credentials:
- User name:
admin!<username> - Password:
<WebTop admin password>
While impersonating you receive similar user privileges, allowing you to control exactly what the user can see. Full administration of user settings is available directly in the administration interface, by right-clicking on a user: the settings menu will open the full user settings panel, with all options unlocked.
You can also change the email of all selected users:
- select the users (Click + CTRL for multiple selection)
- right-click on Bulk update email domain
Two-factor authentication (2FA)
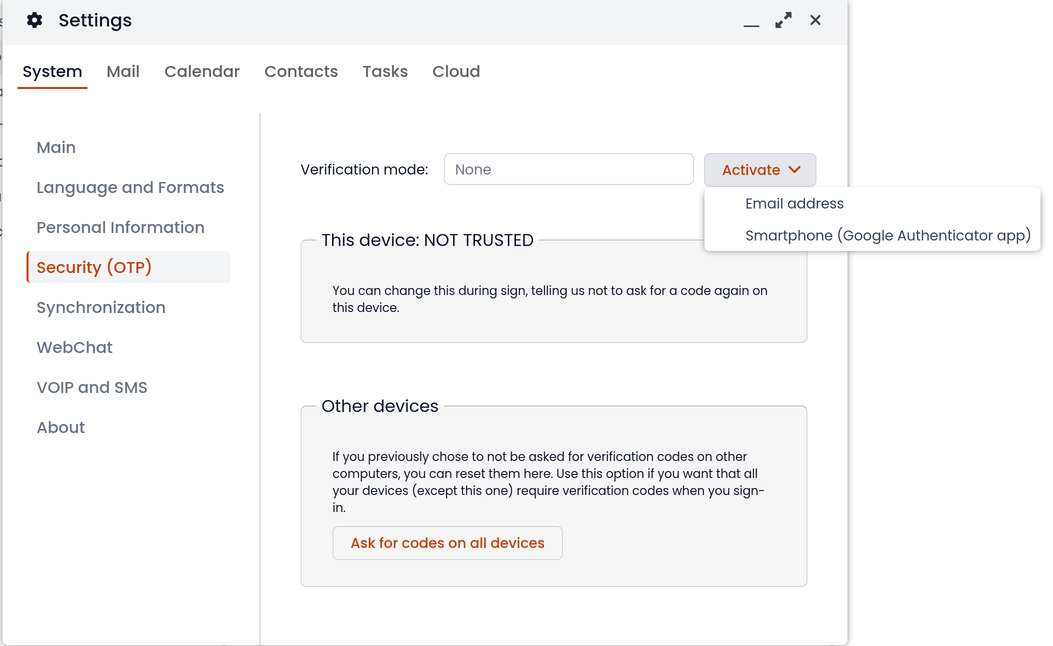
WebTop supports two factor authentication. The user can choose between:
To enable 2FA:
- click on the menu button on the top-right corner and select the Settings icon
- then select Security and click on the Activate button
New device notification
You can receive an email that notifies when a new device accesses the account for the first time.
By default, this feature is disabled for all users to avoid too many unintentional false positives on first login.
You can customize this feature by accessing the administrator panel.
Accesses made through impersonate (admin!<user>) will never send an email notification