Calendar
Edit calendar settings
For each personal calendar, you can change the default settings. Select the calendar and click the kebab menu on the right, or right-click the calendar, then select Edit calendar.
You can change these calendar properties:
- name and color
- description
- EAS synchronization (
Active,Disabled, orRead-only)
You can change these default properties for events created in this calendar:
Visibility: choose betweenNormalandPrivate. Events created withPrivatevisibility in shared calendars do not show the title and description, but only the busy time.Set status: choose betweenAvailableandBusy- default reminder
- enable
Send me a notification when someone modifies my calendar. In shared calendars, you receive a notification when another user creates a new event.
You can always change these properties while creating each single event if they need to differ from the defaults.
Other default configurations are available from the Settings menu in the upper-right corner: click the circle with the user's initials, then select Settings > Calendar.
You can configure:
Default view: choose betweenDay,Week (5d),Week,Bi-week, andMonthTime resolution: choose between15and30minutesWorking hours: set the start and end time. The grid shows a white background for this interval.Reminder notification: choose betweenIn WebTopandEmailNew event>Hide description on opening: enable or disable this option. When you open a new event, the description field is open or closed according to this setting.CalDAV>Enable invitees notification: enable or disable this option. For some CalDAV clients, you may need to disable this option.
ActiveSync (EAS) synchronization
Mobile devices can be synchronized using ActiveSync. ActiveSync can be used only for contacts and calendars.
Always use the full user name format <user>@<domain> to access ActiveSync.
The ActiveSync protocol is supported only on Android and iOS devices. Outlook is not supported.
Apple iOS
Access your iOS device, navigate to Settings and add an Exchange account following the official guide.
Fill the required fields with:
- E-mail: add your mail address, eg: goofy@nethserver.org
- Server: add your server public name, eg: mail.nethserver.org
- Domain: leave blank
- User name: enter your full user name, eg: goofy@nethserver.org
- Password: enter your password
iOS devices require a valid SSL certificate on the server. See TLS certificates
Google Android
Access your Android device, navigate to Settings, then select Add account -> Exchange (or Company for older releases).
Fill the required fields with:
- User name: enter your full user name, eg: goofy@nethserver.org
- Password: enter your password
Then select Manual configuration and change the name of the Server field accordingly to your server public name. Finally, if you have a self-signed certificate on your server, make sure to select SSL/TLS (accept all certificates) option.
On some Android releases (notably Samsung), the User name and Domain must be entered in the same line. In this case, leave blank the field before the backslash character \, and enter the user name in the following format: \goofy@nethserver.org
Multiple calendars and contacts
Shared calendars and address books can be synchronized using the ActiveSync protocol.
Shared resources are displayed with the owner's name and category. The number in square brackets is the internal id. Private events are not synchronized.
Mobile devices based on Apple iOS fully support folders/categories for calendars, contacts and activities (called reminders), including original colors.
Mobile devices based on Android support only calendars and contacts, activities are not supported. Using the Google Calendar application all items will have the same color.
Installing and using the CloudCal application, you can change the colors associated with each calendar, including shared ones.
On Android devices, contacts from shared phone books are merged with the personal phone book and displayed in a single view. Contacts can be modified and changes will be saved in the original source.
In order to receive data via EAS on mobile devices, shared resources (Calendars and Contacts) should have synchronization enabled (Active or Read-only):
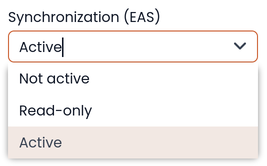
It is possible to enable or disable the synchronization for each shared resource.
To do so, just right-click on the shared resource Customize → Devices sync.:
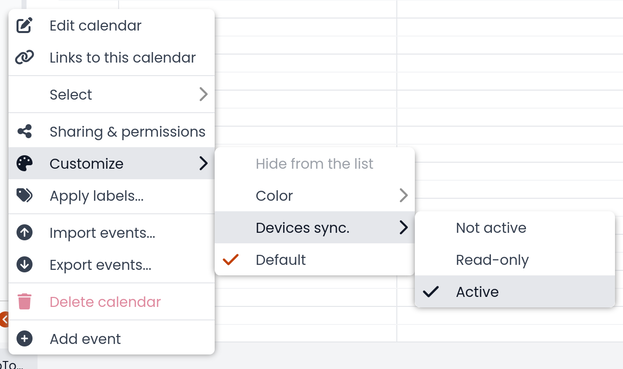
The default setting is Not active.
CalDAV synchronization
Calendars can be synchronized through the CalDAV protocol.
To synchronize a calendar, pick up its URL link right-clicking on the calendar and selecting Links to this calendar, then use it to configure your third-party client.
To authenticate, provide your credentials in the following form:
- User name: enter your full user name (i.e. goofy@nethserver.org)
- Password: enter your password
Some third-party clients allow simplifying the configuration through the auto-discovery feature that automatically discovers the synchronizable resources, as in the case of mobile devices (i.e. Android or iOS devices).
If you are using clients that do not support auto-discovery, you need to use the full URL: https://<server_name>/webtop-dav/server.php
If you are using clients that support auto-discovery use the URL: https://<server_name>
Google Android
A good Android third-party client is DAVx5.
- add a new account clicking on + key and select Login with URL and username method
- insert the
URL(https://<server_name>), full username (i.e. goofy@nethserver.org) and password - click on the new profile and select the resources you want to synchronize
Apple iOS
CalDAV support is built-in on iOS, so to configure it:
- go to Settings -> Account and Password -> Add account
- select Other -> Add CalDAV account
- insert the server name (i.e. server.nethserver.org), full username (i.e. goofy@nethserver.org) and password
Desktop clients
Thunderbird
Thunderbird already includes support for CalDAV calendars.
Outlook
The Open Source CalDAV Synchronizer plugin for Outlook supports CalDAV.
WebTop is a client-less groupware: its functionalities are fully available only using the web interface!
The use of CalDAV through third-party clients cannot be considered a web interface alternative.
Sharing calendars
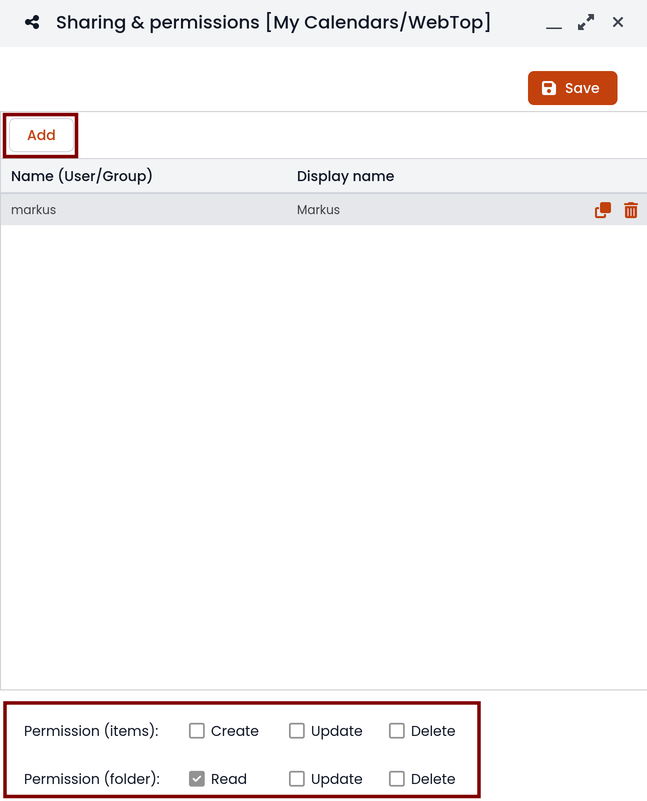
You can share each personal calendar individually. Select the calendar to share -> right click -> Sharing and permissions:
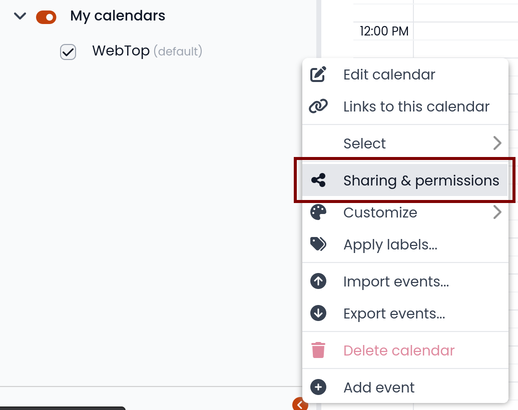
Select the recipient user of the share (or Group) and enable permissions for both the folder and the individual items:
Jitsi integration
With this integration it is possible to start a new video conference and send the invitation via email, or schedule one by creating the event directly from the calendar. To activate the integration it is necessary to configure the Jitsi instance that you would like to use directly from admin panel by modifying the documented global settings
By default, the videoconferencing service is disabled for all users. To enable it, for all users it is necessary to add a specific authorization from the administration panel:
- Access the Administration menu, then
Domains --> NethServer --> Groups --> Users --> Authorizations Add (+) --> Services --> com.sonicle.webtop.core (WebTop) --> Resource MEETING --> Action --> CREATE- Click OK then save and close
The conference will be available for the users after a new login.
To create a new video conference meeting, you can start from these two buttons:
(top left)
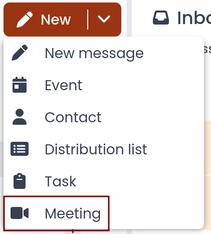
(top right)

It is also possible to do this from a new email window or a new calendar event.
For each new meeting you have to decide whether it should start immediately (instant meeting) or if it should be scheduled by invitation.
There are several ways to share the new meeting link:
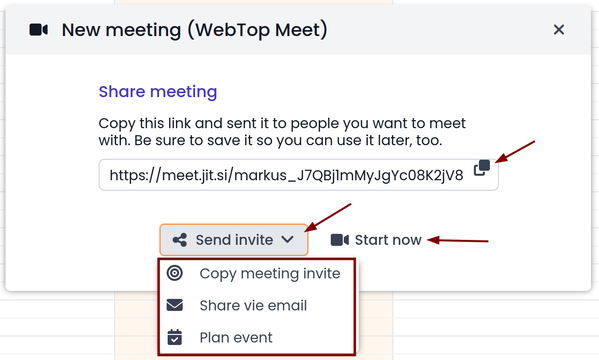
- Start now allows you to immediately access the newly created meeting room and copy the link via the button available next to the URL
- Send invitation -> Copy meeting invite: in this case an invitation message, which also includes the meeting link, will be copied (e.g: To join the meeting on Jitsi Meet, click this link: ...)
- Send invitation -> Share by email: you will be asked if you would like to change the subject and date of the meeting, which will then be inserted in the newly generated email:
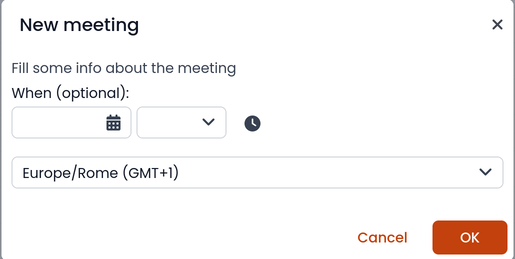
- Send invitation -> Plan event: also in this case you will be asked if you would like to change the subject and date/time of the meeting before creating the calendar event that will allow you to invite other participants.
If an event contains a link to a third-party video conference, the buttons that will allow you to access the meeting directly:
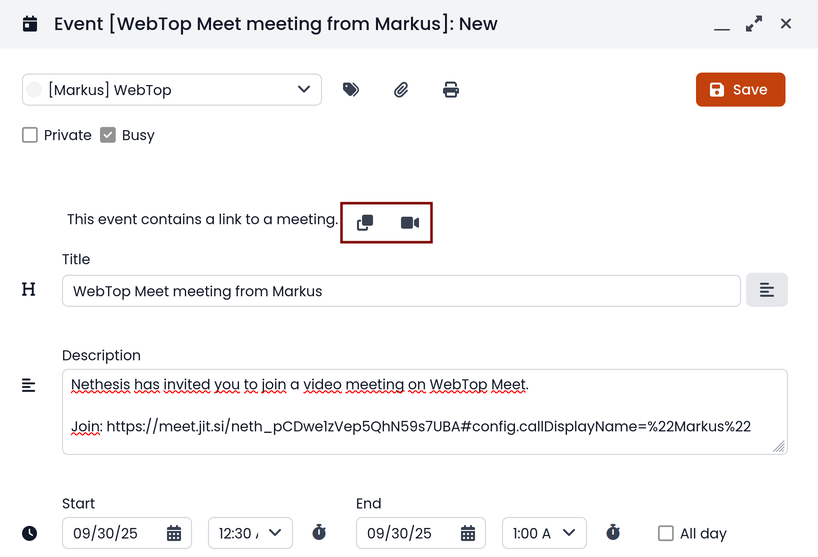
Third-party video calls
The video conferencing services that are currently supported, in addition to Jitsi, are: Google Meet, MS Teams and Zoom. It is possible to add additional platforms through a global setting.
Subscribing remote calendars
WebTop supports subscriptions to remote calendars using CalDAV and iCal.
Remote calendars
An Internet Calendar can be added and synchronized. To do so just click the right button on personal calendars, Add Internet Calendar. Two types of remote calendars are supported: WebCal (ICS format) and CalDAV.
Synchronization of Webcal calendars (ICS) is always done by downloading every event on the remote resource every time, while only the differences are synchronized with the CalDAV mode
Example of Google Cal remote calendar (Webcal only - ICS)
- Take the public access ICS link from your Google calendar: Calendar options -> Settings and sharing -> Secret address in iCal format
- On WebTop, add an Internet calendar of type Webcal and paste the copied URL without entering the authentication credentials in step 1 of the wizard.
- The wizard will connect to the calendar, giving the possibility to change the name and color, and then perform the first synchronization.
The first synchronization may fail due to Google's security settings. If you receive a notification that warns you about accessing your resources you need to allow them to be used confirming that it is a legitimate attempt.
Automatic synchronization
To synchronize automatically you can choose between three time intervals: 15, 30 and 60 minutes. The choice of the time interval can be made in the creation phase or later by changing the options. To do this, right-click on the calendar, Edit Category, Internet Calendar:
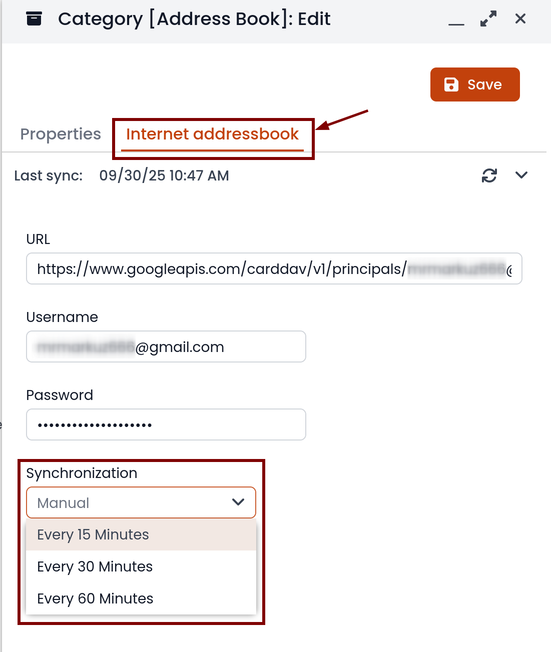
Manual synchronization
To update a remote calendar, right-click on it and then select Synchronize:
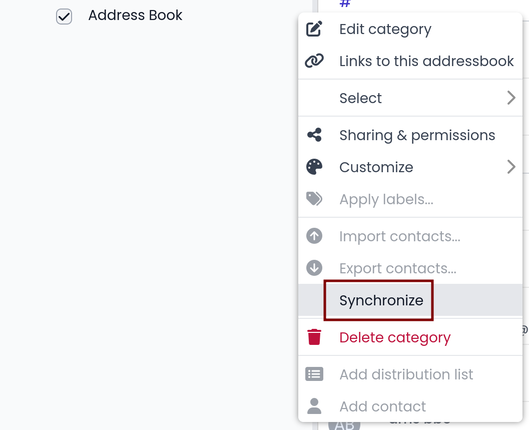
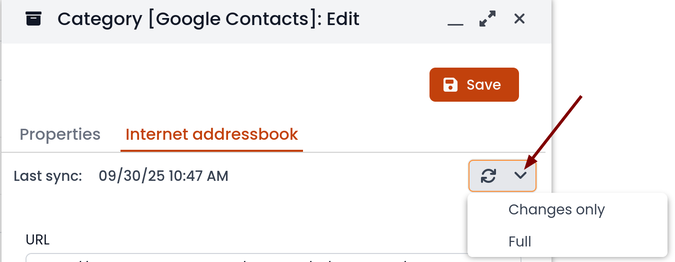
For remote CalDAV calendars, you can select whether to perform a full synchronization or only for changes. To do this, right-click on the calendar, Edit Category:
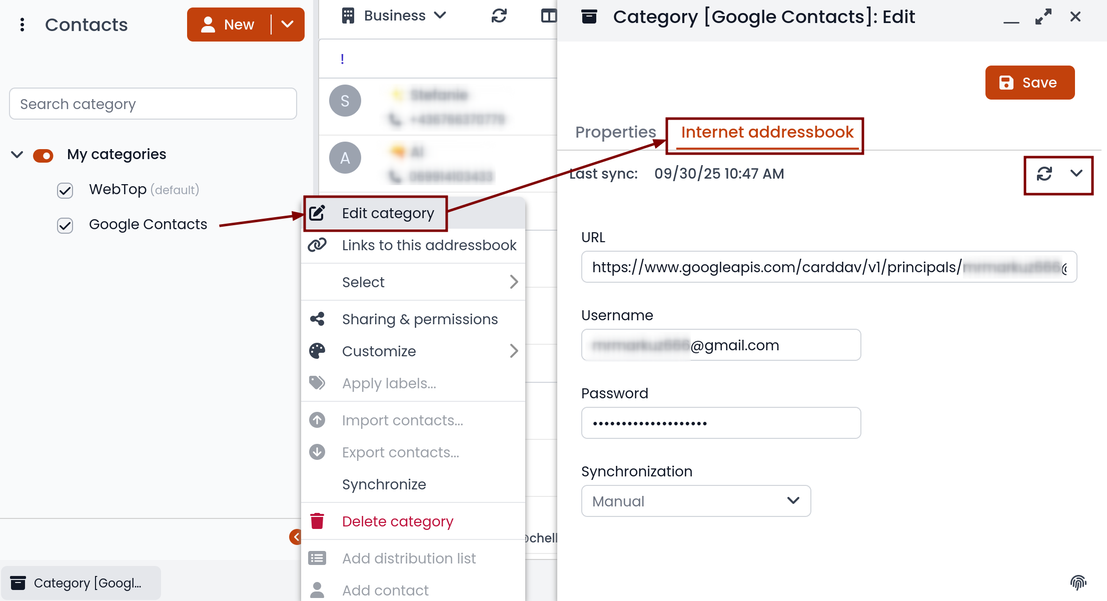
Select the desired mode next to the synchronization button:
Import calendars
WebTop supports importing calendars from file formats.
Supported calendar format: iCalendar (*.ics, *.ical, *.icalendar)
To import events:
-
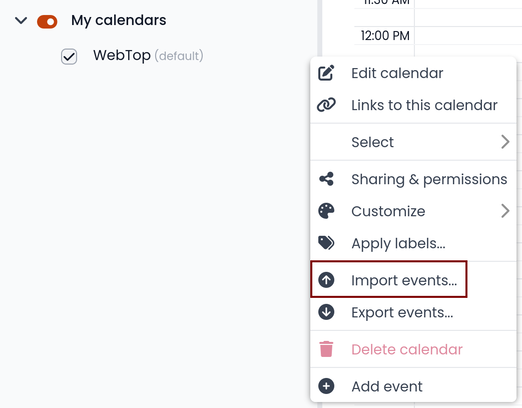
right click on the target calendar, then select Import events
-
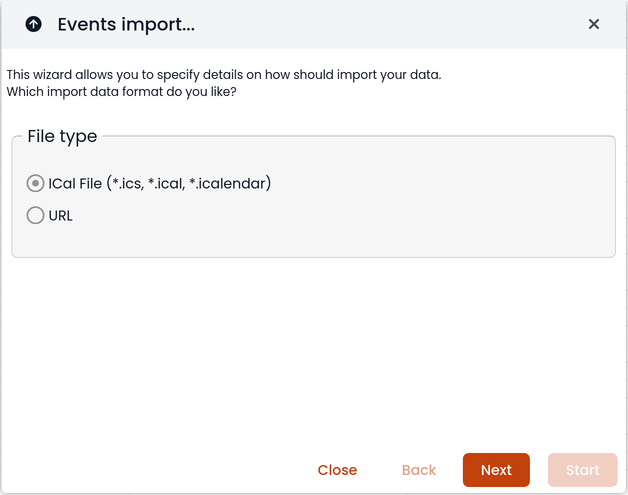
select the import format
-
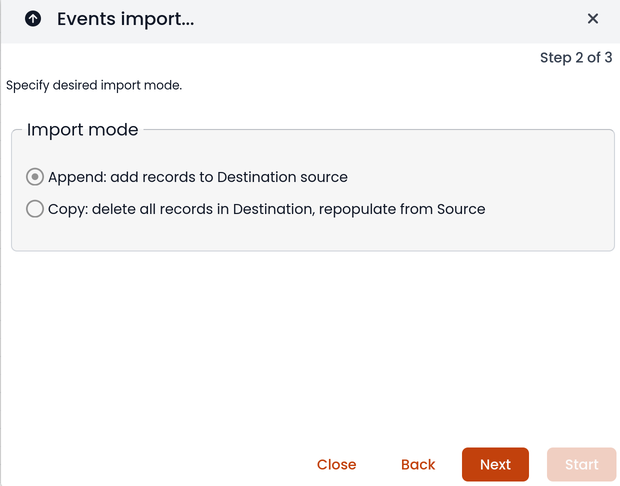
then choose if you want to delete all existing events and import new ones, or just append imported data to existing calendar events