Cloud
Use this section to manage Nextcloud resources, personal cloud links, chat, and launcher integrations in WebTop.
Nextcloud integration
Before proceeding, verify that the Nextcloud module has been installed from the Software center.
By default, Nextcloud integration is disabled for all users. To enable it, use the administration panel which can be accessed using the webtop admin password
If you want to enable the service for all users, proceed as follows:
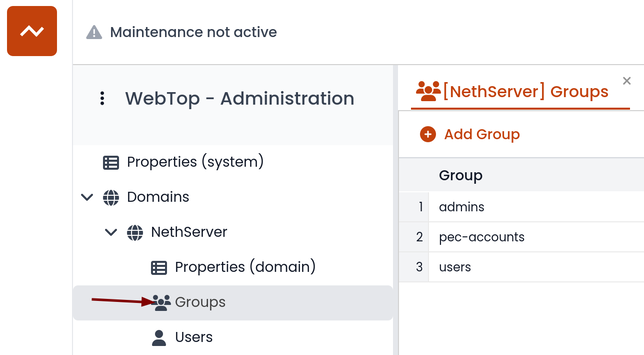
- access the administrative panel and select Groups:
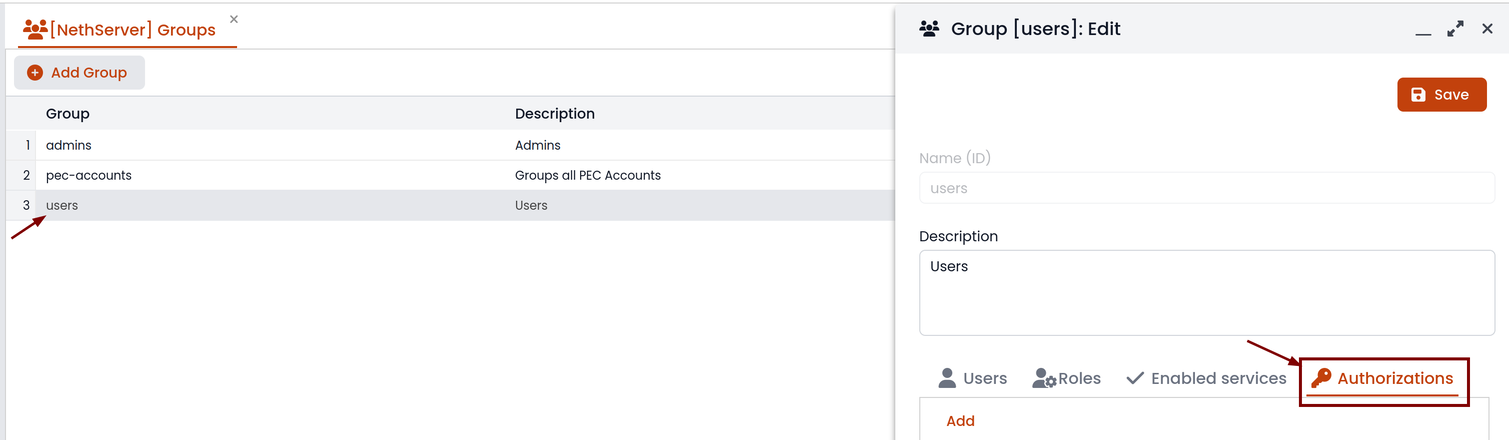
- modify the properties of the "users" group by double-clicking and selecting the button related to the Authorizations:
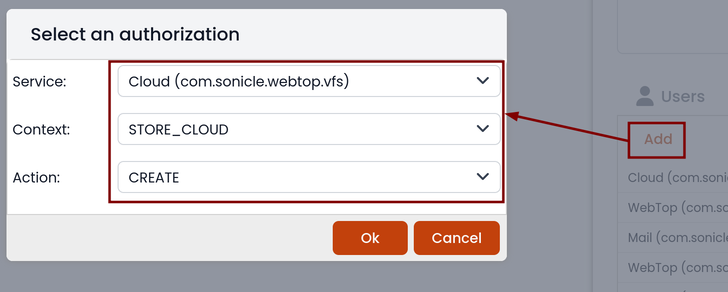
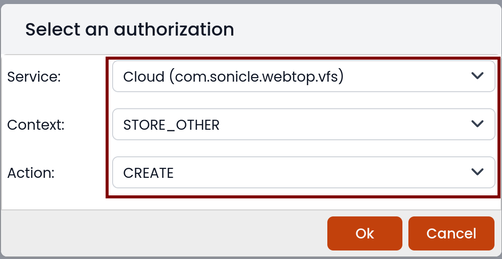
- add to existing authorizations those related to both the
STORE_CLOUDandSTORE_OTHERresources by selecting the items as shown below:
to get this:
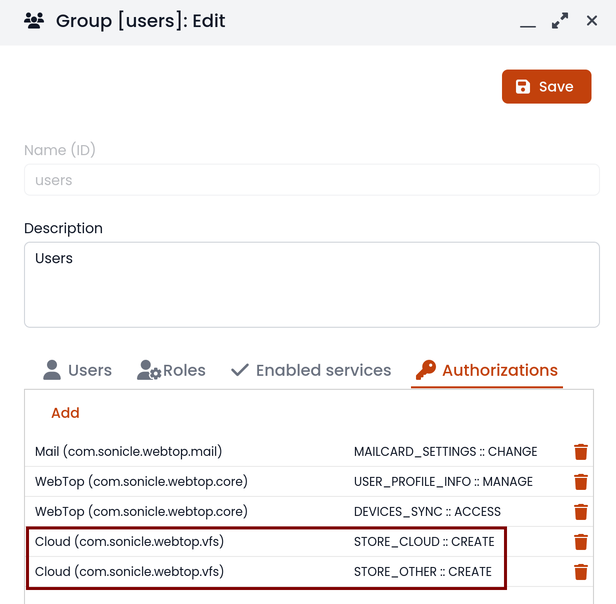
- save and close.
From now on, any user will be able to insert the Nextcloud resource (local or remote) in the personal Cloud.
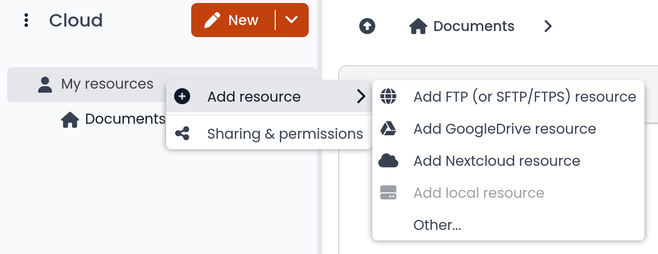
To do this, simply select the Cloud button and add a new Nextcloud resource by right-clicking on My resources and then Add resource in this way:
A pre-filled wizard will open:
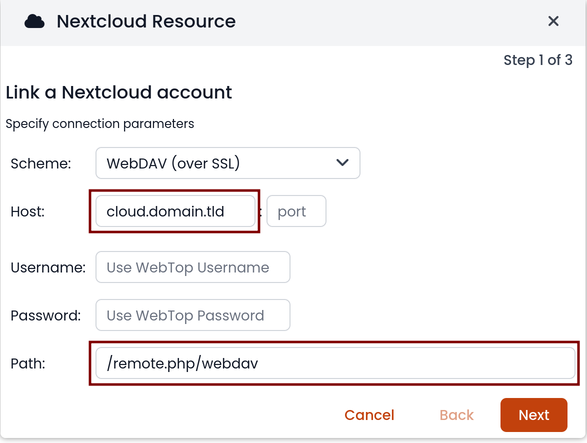
Remember to fill in the User name and Password fields related to access to the Nextcloud resource, otherwise it will not be possible to use the public link to the shared files
The Path must be changed from /nextcloud/remote.php/webdav to /remote.php/webdav. Also make sure to enter the Nextcloud FQDN inside the Host (eg. nextcloud.mydomain.com).
Proceed with the Next button until the Wizard is complete.
Personal Cloud
The personal Cloud module allows you to send and receive documents via web links.
How to create a link to send a document
To create the link, select the button at the top right:
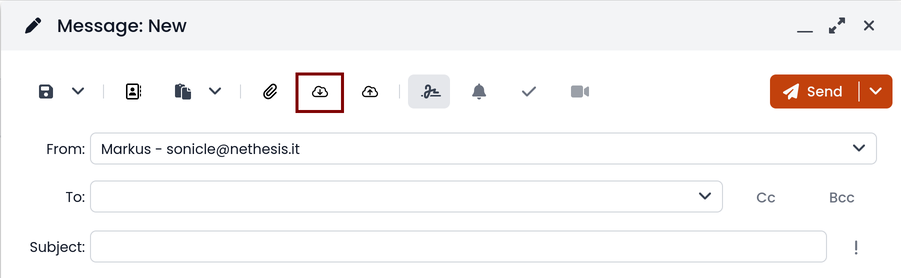
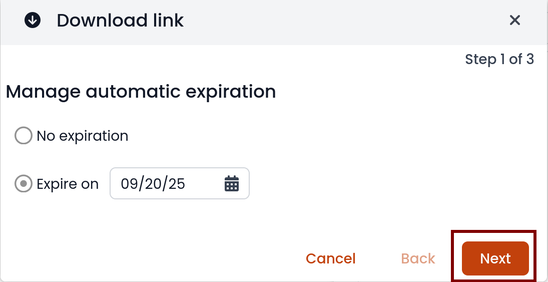
Follow the wizard to generate the link, use the field date to set the deadline.
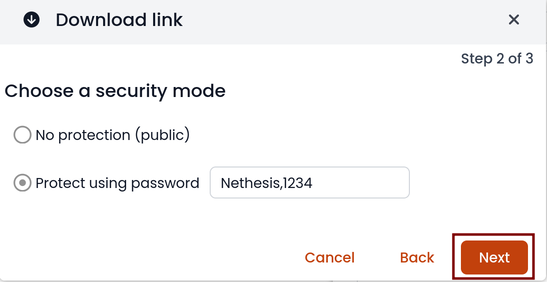
you can create a password to protect it:
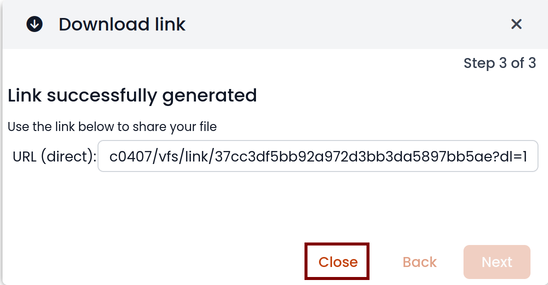
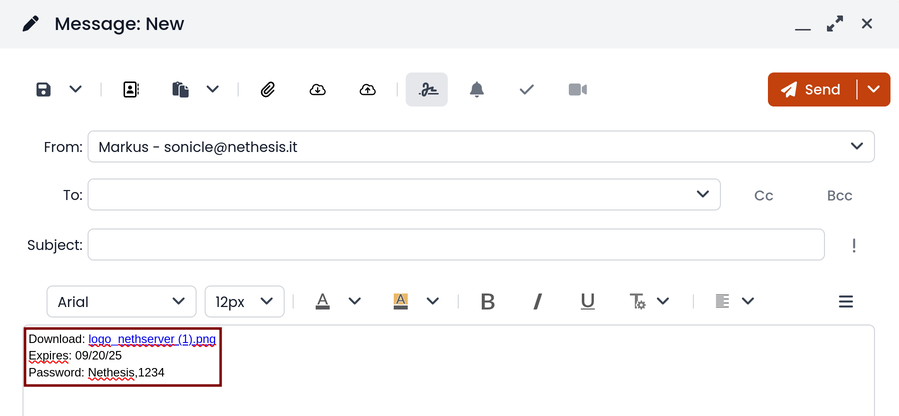
The link will be generated and will be inserted in the new mail:
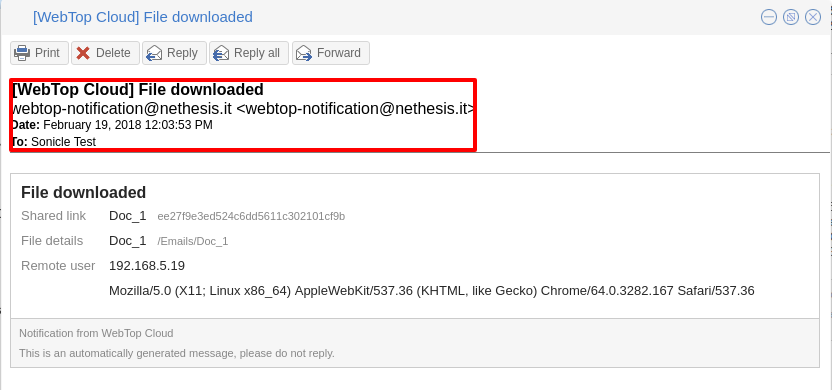
Downloading the file generates a notification to the sender:
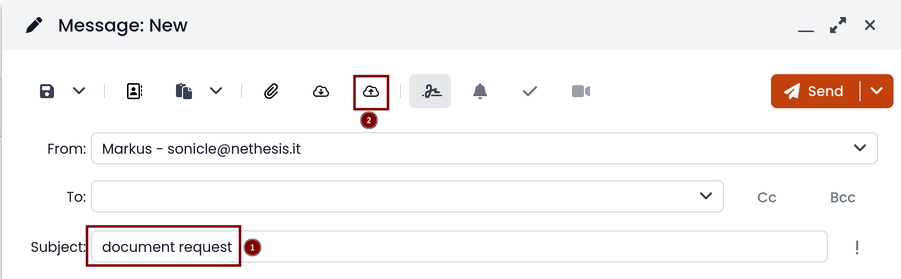
Request for a document
To create the request, insert the subject of the email then select the button at the top right:
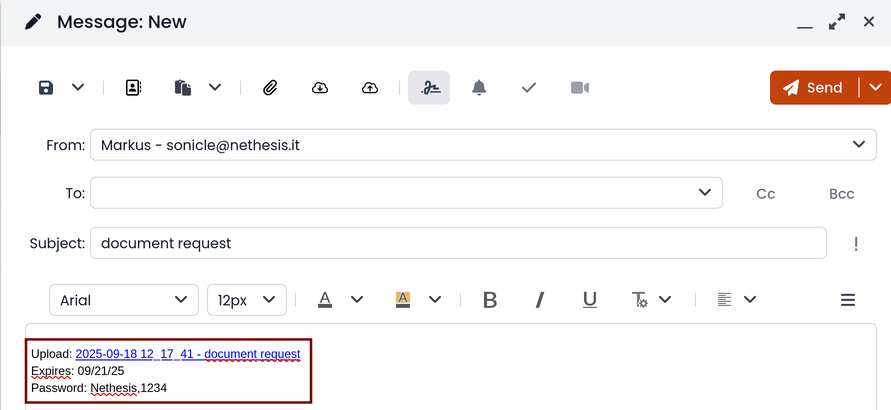
Follow the wizard. You can set both an expiration date and a password. The link will be automatically inserted into the message:
A request email will be sent to upload the document to the Cloud:

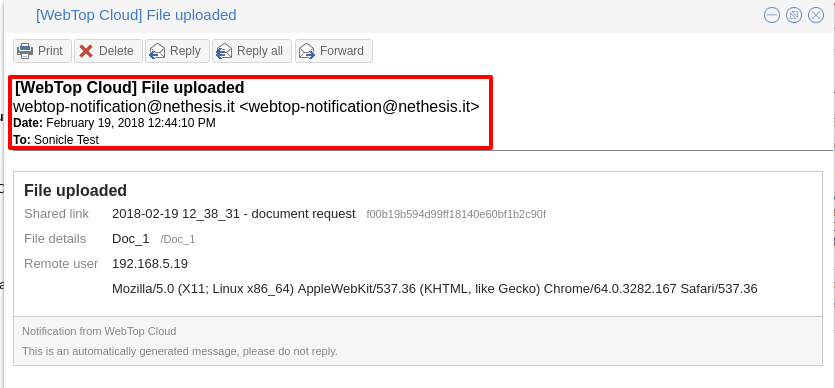
The sender will receive a notification for each file that will be uploaded:
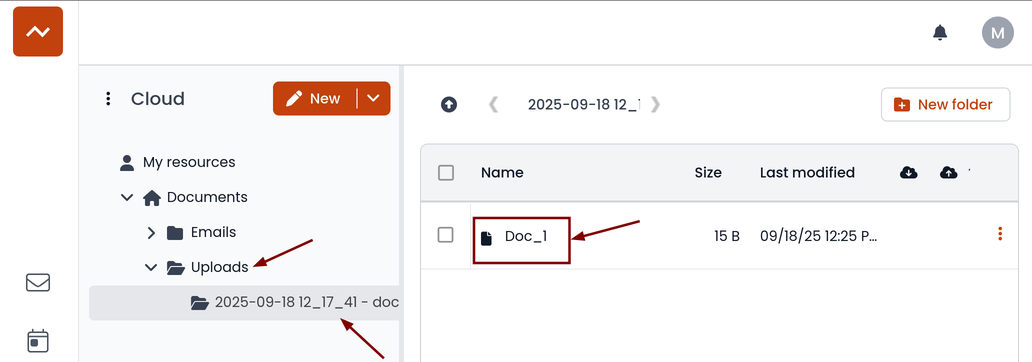
To download the files just access your personal Cloud --> Uploads --> Folder with date and name:
Launcher customization
The launcher is the icon-based menu on the left of the page. You can add custom buttons to the launcher.
To configure the buttons, access the WebTop administration panel and select -> Domains -> NethServer -> Launcher :
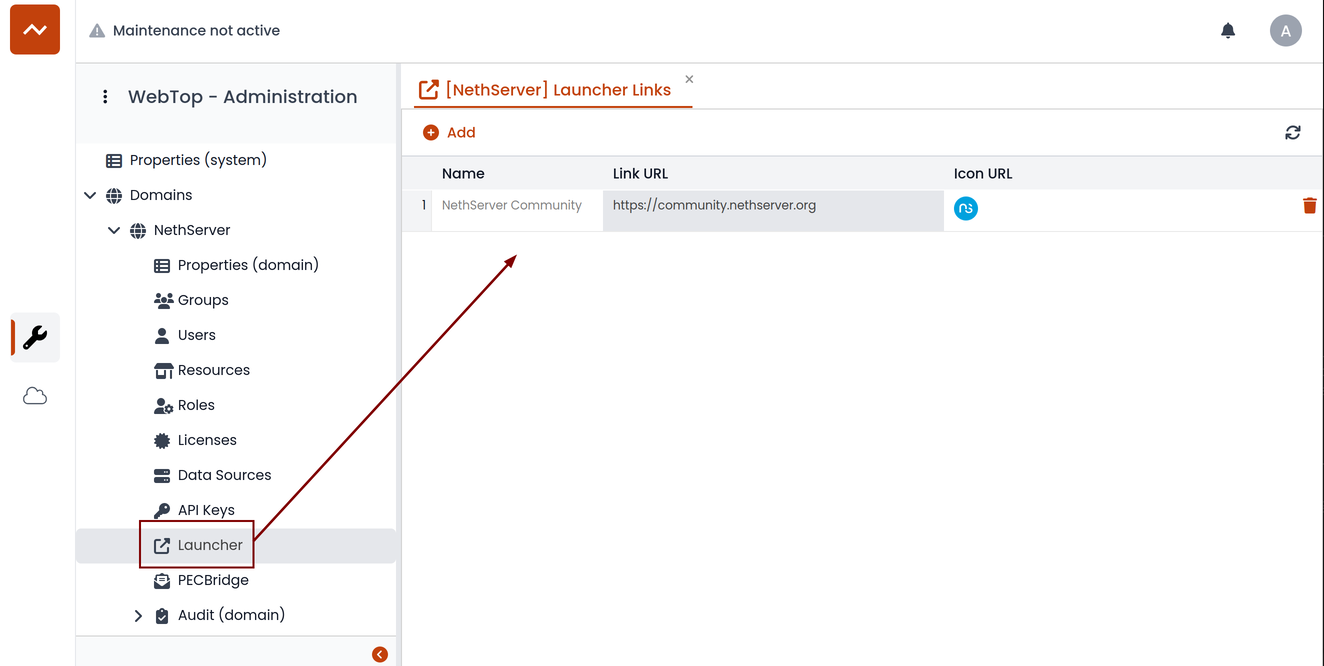
For each button, enter these three values
Name: tab descriptive text that appears with mouse-overLink URL: URL to be opened in a new browserIcon URL: icon image URL, it should always be a publicly reachable address. To avoid scaling problems, use vector images
If you can't find a public URL for the icon image, you can upload the icon on WebTop public cloud. WebTop public cloud already hosts mailcards images. Access the administrator panel and click on Cloud -> Public Images, then insert a URL like https://<public_name_server>/webtop/resources/156c0407/images/<icon.svg>.
The configured custom link buttons will be shown to all users at the next login.