Contacts
Edit address book settings
For each personal address book, you can change the settings. Select the address book and click the kebab menu on the right, or right-click the address book, then select Edit Category.
You can change these address book properties:
- name and color
- description
- EAS synchronization (
Active,Disabled, orRead-only)
Other default configurations are available from the Settings menu in the upper-right corner: click the circle with the user's initials, then select Settings > Contacts.
You can configure:
Default view: choose betweenOfficeandHomeDisplay names as: choose betweenFirst name Last name,Last name, First name, andDisplay nameGrouping: choose betweenAlphabeticalandCompanyAnniversary notification: choose betweenDisabled,In WebTop, andBy emailAnniversary notification time: choose the time when you receive anniversary notifications
ActiveSync (EAS) synchronization
Mobile devices can be synchronized using ActiveSync. ActiveSync can be used only for contacts and calendars.
Always use the full user name format <user>@<domain> to access ActiveSync.
The ActiveSync protocol is supported only on Android and iOS devices. Outlook is not supported.
Shared contacts can also be synchronized. For the full mobile setup procedure, see Calendar.
CardDAV synchronization
Address books can be synchronized through the CardDAV protocol.
To synchronize an address book, pick up its URL link right-clicking on the address book and selecting Links to this address book, then use it to configure your third-party client.
To authenticate, provide your credentials in the following form:
- User name: enter your full user name (i.e. goofy@nethserver.org)
- Password: enter your password
Some third-party clients allow simplifying the configuration through the auto-discovery feature that automatically discovers the synchronizable resources, as in the case of mobile devices (i.e. Android or iOS devices).
If you are using clients that do not support auto-discovery, you need to use the full URL: https://<server_name>/webtop-dav/server.php
If you are using clients that support auto-discovery use the URL: https://<server_name>
Google Android
A good Android third-party client is DAVx5.
- add a new account clicking on + key and select Login with URL and username method
- insert the
URL(https://<server_name>), full username (i.e. goofy@nethserver.org) and password - click on the new profile and select the resources you want to synchronize
Apple iOS
CardDAV support is built-in on iOS, so to configure it:
- go to Settings -> Account and Password -> Add account
- select Other -> Add CardDAV account
- insert the server name (i.e. server.nethserver.org), full username (i.e. goofy@nethserver.org) and password
Desktop clients
Thunderbird
To synchronize the contacts with CardDAV you need a third-party add-on like Cardbook.
Outlook
The Open Source CalDAV Synchronizer plugin for Outlook supports both CardDAV and CalDAV.
WebTop is a client-less groupware: its functionalities are fully available only using the web interface!
The use of CardDAV through third-party clients cannot be considered a web interface alternative.
Sharing contacts
You can share your contacts by selecting the directory you want to share -> right click -> Sharing and permissions. Select the recipient user of the share (or Group), and enable permissions for both the folder and the individual items.
SMS integration
It is possible to send SMS (Short Message Service) messages to a contact that has the mobile number in the address book. To activate sending SMS, first you need to choose one of the two supported providers: smshosting or twilio.
Once registered to the service of the chosen provider, retrieve the API keys (AUTH_KEY and AUTH_SECRET) to be inserted in the WebTop configuration db. The settings to configure are those shown here .
You can do it by accessing the administration panel -> Properties (system) -> Add -> select com.sonicle.webtop.core (WebTop) and enter the data in the Key and Value fields according to the key to be configured:
sms.provider = smshosting or twilio
sms.provider.webrest.user = API AUTH_KEY
sms.provider.webrest.password = API AUTH_SECRET
sms.sender = (default optional)
The sms.sender key is optional and is used to specify the default sender when sending SMS. It is possible to indicate a number (max 16 characters) or a text (max 11 characters).
Each user can overwrite the sender by customizing it as desired through its settings panel: WebTop -> Switchboard VOIP and SMS -> SMS Hosting service configured -> Default sender
To send an SMS from the address book, right-click on a contact that has the mobile field filled in -> Send SMS
Subscribing remote contacts
WebTop supports subscriptions to remote contacts using CardDAV.
Remote contacts (directory)
Google CardDAV remote address book
Steps:
-
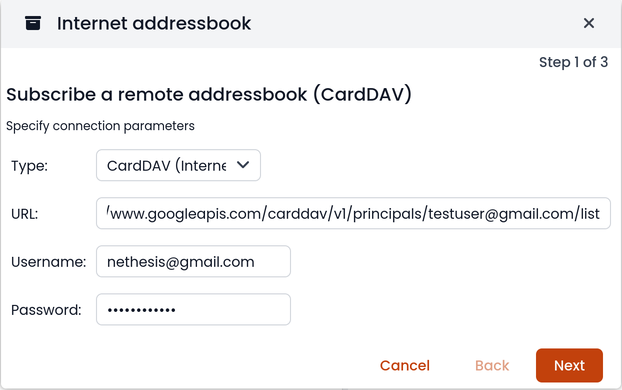
on WebTop, configure a new Internet address book, right-click on Personal Categories -> Add Internet address book and and enter a URL of this type in step 1 of the wizard:
https://www.googleapis.com/carddav/v1/principals/XXXXXXXXXX@gmail.XXX/lists/default/Replace theXwith your GMail account -
enter the authentication credentials (as user name use the full address of gmail):
-
the wizard in the following steps will connect to the phonebook, giving the possibility to change the name and color, and then perform the first synchronization
You must enable the synchronization into your Google account and enable access for App Password.
Synchronization of remote resources can be performed manually or automatically.
Automatic synchronization
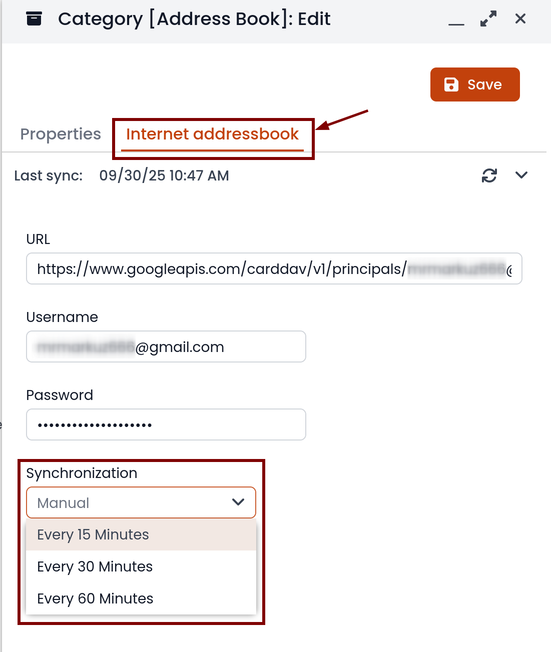
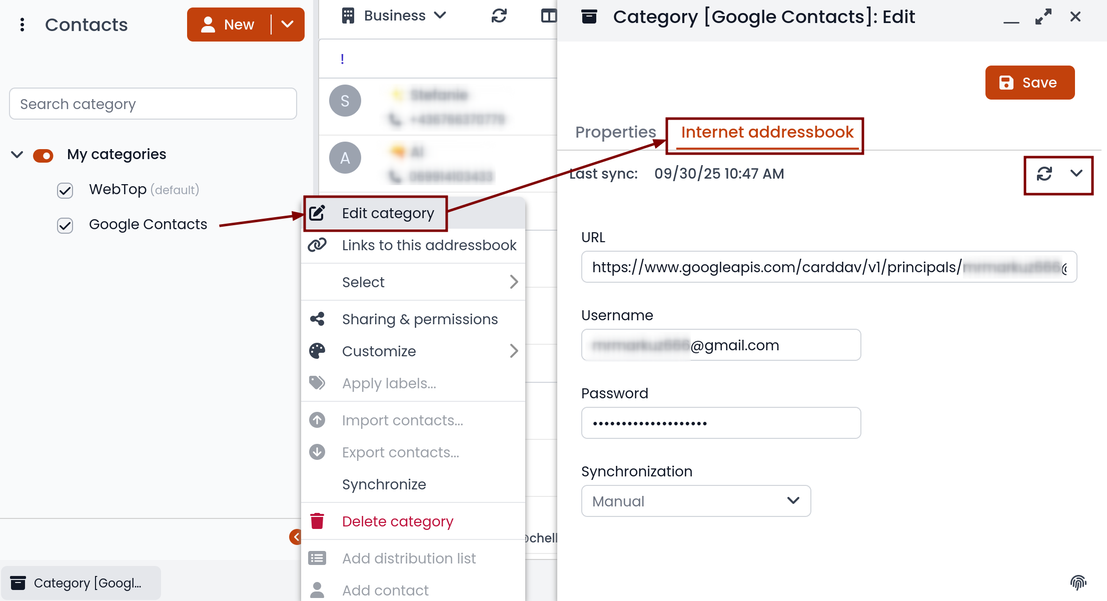
To synchronize automatically you can choose between three time intervals: 15, 30 and 60 minutes. The choice of the time interval can be made in the creation phase or later by changing the options. To do this, right-click on the phonebook, Edit Category, Internet Addressbook:
Manual synchronization
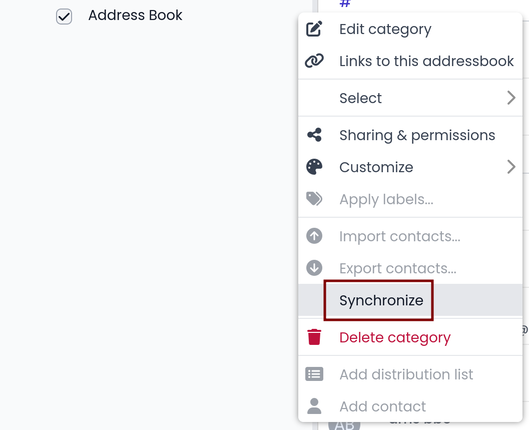
To update a remote address book, for example, click on it with the right mouse button and then select the item "Synchronize":
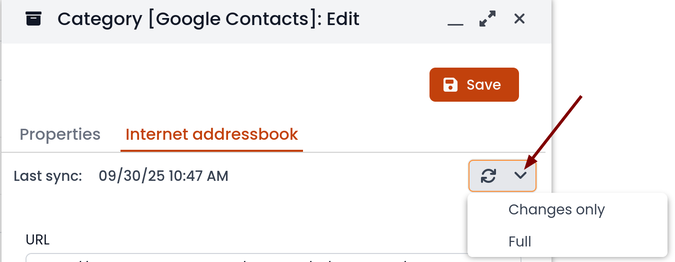
For CardDAV address books, you can select whether to perform a full synchronization or only for changes. To do this, right-click on the phonebook, Edit Category:
Select the desired mode next to the synchronization button:
Import contacts
WebTop supports importing contacts from various file formats.
Supported contacts format:
- CSV - Comma Separated values (*.txt, *.csv)
- Excel (*.xls, *.xlsx)
- VCard (*.vcf, *.vcard)
- LDIF (*.ldif)
To import contacts:
-
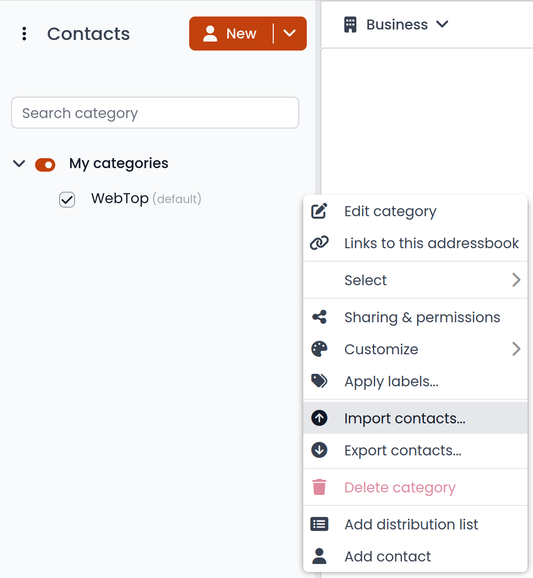
right click on the target phone book, then select Import contacts
-
select the import format and make sure that the fields on the file match the ones available on WebTop
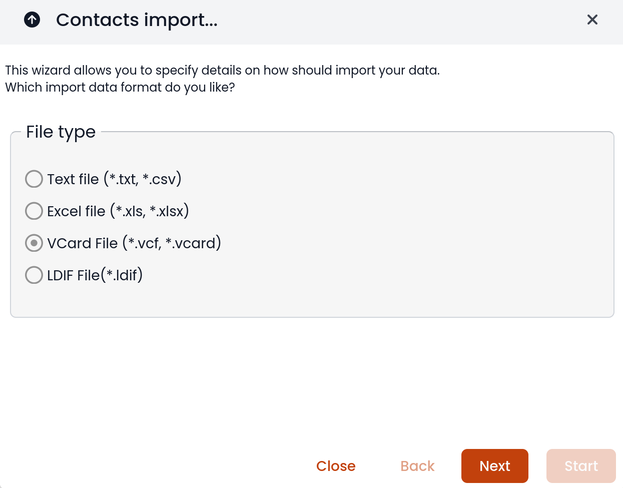
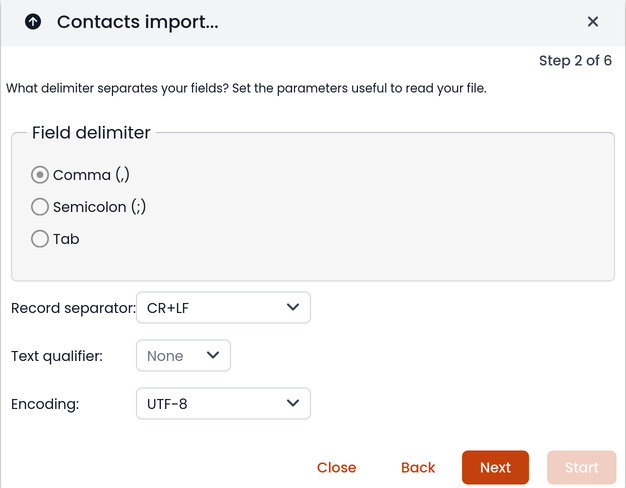
If you are importing a phone book exported from Outlook, make sure to set Text qualifier to " value.